Hi everyone. Happy Labor Day!! So, do you have anything special planned for this holiday weekend? Here at my house, we are enjoying the extra day off before it’s back to work. We thought since we spent so much time working on the house over Memorial Day, we would take it easy this weekend. Over Memorial Day, we decided to do some major yard work and place stone around our house. It took the full three days and then some to get it done but in the end it was worth it. This post will give you an idea of how we completed our landscape project and also help with yours if you are thinking about landscaping your yard. Keep reading to learn How To Landscape – The Basics.
*Note: This post contains affiliate links, so we may earn a small commission when you make a purchase through links on our site at no additional cost to you.
HOW TO LANDSCAPE – THE BASICS

BEFORE PICTURES OF OUR YARD


I crack up when I see these pictures, especially the one of the back yard with the horse on the fence. This is what my house looked like when we bought it. There were no flowers or bushes, so over the years we have been adding to the yard to make it more enjoyable.


My husband Scott is a real handyman. He was able to fix the porch, take out the multiple railings, and also make those cute flower boxes on both sides of the porch.
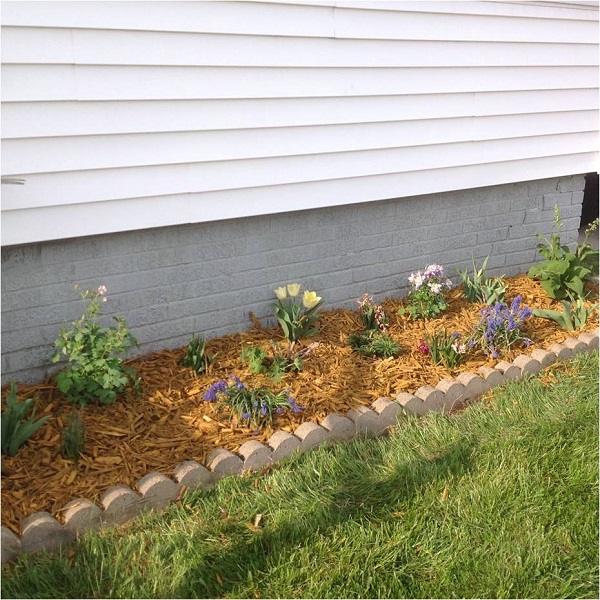

A few years later, we wanted to add more to the yard, so we put down wood chips. Unfortunately, a lot of weeds got through and over the years it got hard to keep up pulling them. This year we decided to go all the way and get the rock for our landscaping. We also bought a few trees and bushes for the front and moved the flowers that we had already to the back yard.
WHAT YOU WILL NEED:
- Spade Shovel
- Tine Rake
- Thatch Rake
- Wheel Barrow
- String
- Stakes
- Hammer
- Level
- Border
- Landscaping Material of Choice
- Weed Barrier Fabric
First, create a design of how you want your landscape project to look. You can draw it by hand or there are many programs to design on either a computer or tablet that will be helpful.
Then, shop around and pick out the type of landscaping material that appeals to your design. For small amounts of material, go to a home center. For large amounts, go to a landscaping supply that will deliver the materials to your house.


Use a garden hose to rough out the design and take measurements.
Calculate the surface area of where you will be landscaping and purchase materials to cover approximately 2″ to 3″ deep (length x width x depth) convert all measurements into feet to get the cubic feet needed. For the border, simply measure the length of hose used to layout the border and you have the linear feet needed to purchase. Add about 10% extra for either damage, inaccuracies calculating or slight deviations form the plan.


Prepare the ground by digging out the grass where you want to put landscaping using a spade shovel.
For straight lines, you can use stakes and string to make sure you have a guide to keep the edging straight. If you don’t have string, use the garden hose again like when you initially roughed out the design. Be careful not to move it accidentally or your straight line will have a few detours.

Prepare the dirt if needed by removing any remaining grass with the thatch rake. Grade the dirt according to where you are landscaping. Use either the thatch or tine rake for this.
Level the dirt as flat as possible if you are in the middle of the yard. As an alternative, you can mound the dirt in the middle if you would like to add dimension to the landscaping and finish the grade to just below the level of the lawn at the border.
** If against a house, then slope the dirt away from the house for proper water drainage. This is important. Take your time and verify with a level if you have to but do not let the slope go towards the house. Unless you want the sump pump to run constantly or the basement to seep water.


Layout the weed barrier fabric. Cut out any areas where either existing shrubs, flowers or trees exist. You can also add plants after you are done by pulling back the landscaping material and cutting an “X” in the fabric or if want to plant some other time. The best and easiest option is to plant right after laying all the fabric in place and before the landscaping material is placed.


Place the border around the perimeter of your landscaping area and also try to keep the fabric under your border for the best weed control.
Add landscaping material when border is complete.


Finally, level the landscaping material and fill in low spots or flatten high spots. There should be 2″ to 3″ typically depending on the materials used and the desired look that you want.


So, there you have it!! In addition to a beautiful yard, you also get less weeds. It’s a lot of work but so worth it in the end.
If you liked How to Landscape – the Basics, check out the DIY Tutorial Ideas page where you can find a variety of fun DIY projects you can do on a rainy day or if your looking to make a gift for someone. We have also included some places to check out to make projects at home!!
Crayola
Crayola has a variety of different fun ideas to do!! You can print free coloring pages, pick from their DIY projects, or pick from their craft kits!! So many different options here.