Hi everyone!! This week, you will get to see how to make your own DIY Purse Hanger With Scrap Wood.
The rooms in our house are on the small side, so it can be difficult to find a spot for all my girly items. We’ve had to be creative and think of ways to organize our things without cluttering up the rooms. Since my husband Scott is so handy, he’s been able to help organize my stuff with a few DIY projects around the house.
If you have read some of my previous posts, you may remember I love clothes and shopping.
10 Sites To Buy and Sell Used Clothing
Over time, I have bought quite a few purses, but ran out of space for them in my bedroom. I didn’t want to hang them in my closet because I have forgotten them in the past when doing this. I also didn’t want them taking up a ton of room or making the bedroom look cluttered. The idea we came up with, was to make me a purse hanger that would fit on the side of my dresser. My husbands concern was how to attach it and not have any damage to the dresser. His thought was, a clamping hanger that he could make out spare wood that was already in his workshop.
*Note: This post contains affiliate links, so we may earn a small commission when you make a purchase through links on our site at no additional cost to you.

I’ve been using this for awhile now and really like how it works. I thought it would be nice to share so others can make one for themselves. Keep reading for instructions on how he turned some extra pieces of wood into a space saving purse hanger.
** Read through the directions completely first before making cuts. Measurements may vary, depending on dresser size.
DIY PURSE HANGER WITH SCRAP WOOD
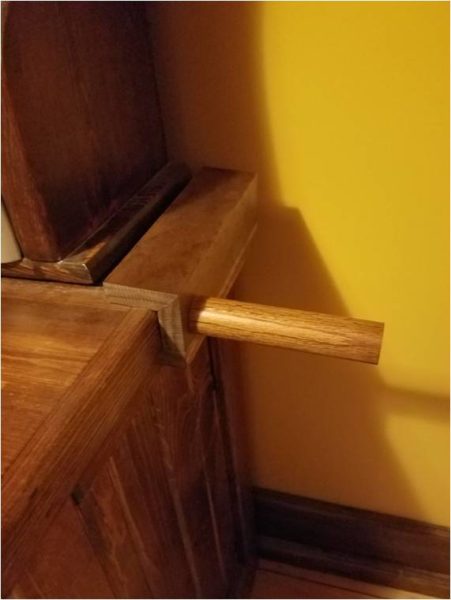
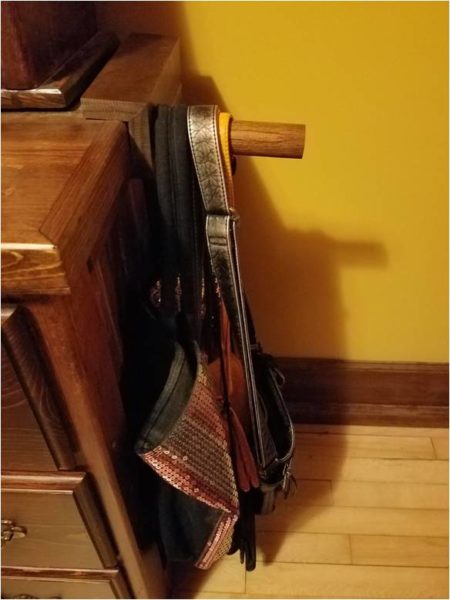
-
Start with a piece of 1 x 6 pine board.
-
Cut the board to 8″ long.
-
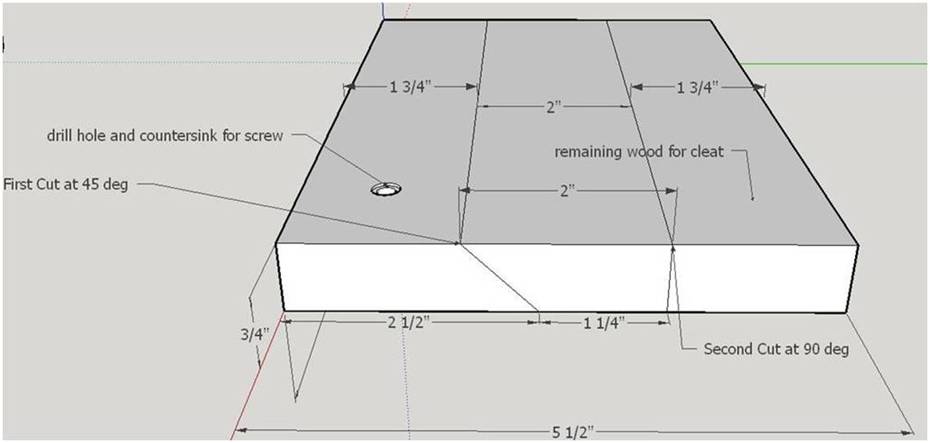
On the table saw, Scott ripped a 45o cut at 2 ½ inches for the side. This gave him enough room to attach the top board and the cleat for the clamp. This has to fit tight on the edge of the dresser, so depending on the thickness of the dresser edge, you will need to adjust this dimension. Remember that 1″ dimensional lumber is actually 3/4″ nominal thickness when calculating the cuts.
-
The next cut will be the top board and includes the angled edge of the board from the first cut. Cut this piece wide enough to ensure the surface area can provide a strong clamping force, he cut his at 1 ¼” contact surface (2″ cut length). By cutting this piece next, you can flip the board and the angled 45o cuts match perfectly for your miter. No worries about being off on the angles.
-
The remaining board after these two cuts were used for the bottom cleat to complete the clamp.
-
Then he glued the 45o cut boards to create a mitered edge so it hid the end grain of the board and looks finished.
-
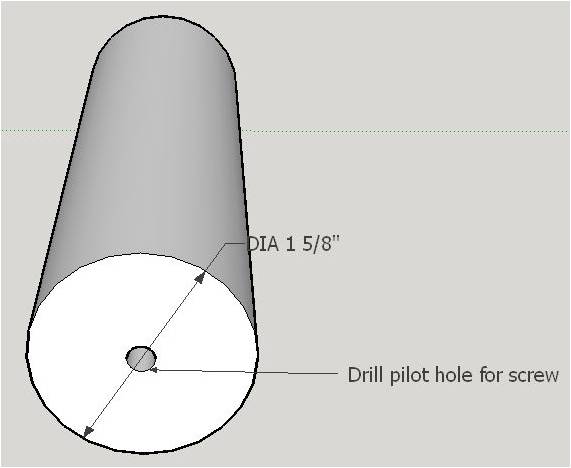
He had to find something that could be used as a hanger section and found a leftover piece of closet clothes rod. This was perfect! Cutting a piece at 6″ worked well. If it is too long, the weight on the end will pull the clamp off the dresser. Trust me on this one.
-
Drill through the first board you cut. The one that will be on the side of the dresser for a 1 ½” screw. If you have the bits (a larger drill bit is an option but it should be slightly bigger than the screw head). I recommend countersinking this hole so the screw head is recessed and not damage the finish of the dresser. If not, anything that covers the screw head will work to protect the finish. This will be used from the back side to attach the closet rod piece. Pre-drill the closed rod as close to center as possible to a depth longer than the screw you are using or the screw will bottom out and strip the wood out.
-
Now the hanger is attached, finish the wood in your favorite color and let dry. When the finish is dry, screw the bottom cleat to the board with the hanger to complete the clamp mechanism.
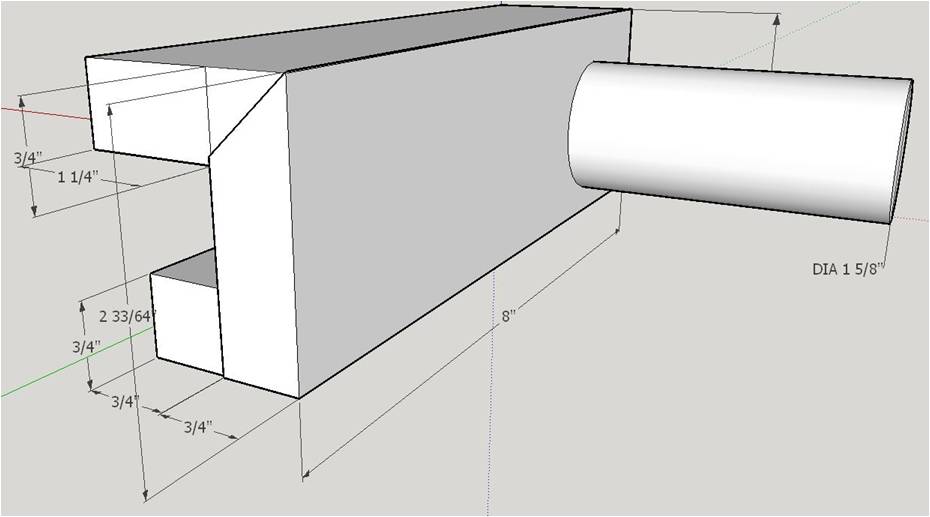
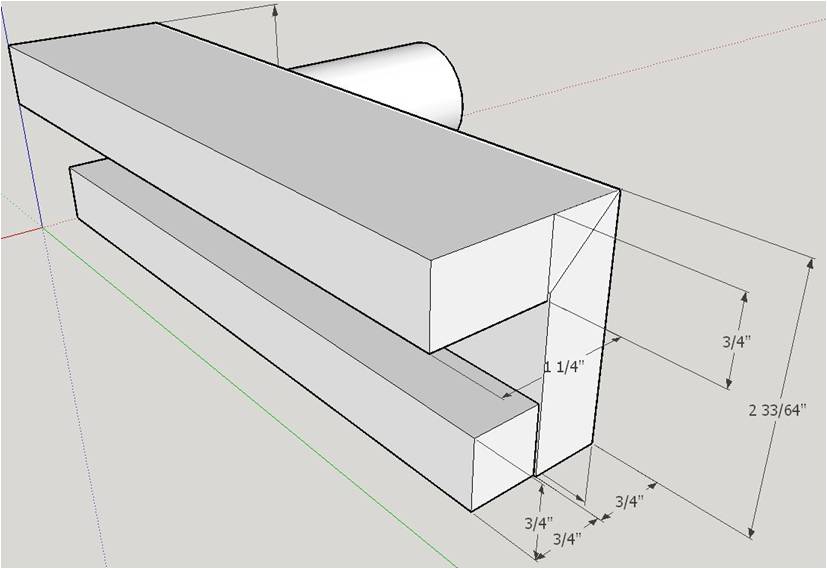
So, there you have it. Your very own, DIY purse hanger made from scrap wood. It’s a great way to save space and also have your items available.
If you liked the DIY Purse Hanger With Scrap Wood project, check out the DIY Tutorial Ideas page where you can find a variety of fun DIY projects you can do on a rainy day or if your looking to make a gift for someone.
Crayola
Crayola has a variety of different fun ideas to do!! You can print free coloring pages, pick from their DIY projects, or pick from their craft kits!! So many different options here.